How to grow mushrooms from spores, part three: Spawn to bulk!

Table of Contents
How to grow mushrooms from spores, part three: Spawn to bulk!
Now we’re getting into it! Once again, hopefully you’ve read the previous parts of this guide, Inoculation and Spawn Colonisation, or it’s not going to make a lot of sense. If you haven’t, go and read it. Back? Ace. Here’s where things start to get awesome.
You could just start fruiting off your already colonised spawn (you may have seen people doing this). Don’t do this to grow mushrooms. Or rather, only do this if you wanna fuck about and so something silly for the sake of it. It’s incredibly inefficient – you could get a lot more yield with very little extra effort. You’ve basically already done the hard work, so why wreck it now?

How to Spawn to Bulk
Things you will need
· Coco Coir (buy it from Amazon)
· Disinfectant in a spray bottle
· Water in a spray bottle
· Alcohol Wipes
· Colonised spawn
· Kettle
· Plastic cooler like you’d take to the beach with beers in (they’re like a tenner, just get one)
· Scissors
· Plastic Box to grow in (up to you what size)
· Bubblewrap
You’ve got your bag of colonised grain, excellent. This stuff is now pretty hardy – whilst I don’t recommend playing with it endlessly, you’ve got to the stage where it can fight off airborne contaminants now, so you can relax a bit. The mycelium has taken up most of the available nutrients from the grain, so even if other spores land on it (and they will, our houses are full of Trich spores and yeast spores) there’s nothing much for them to get started on.
Now you decide how big a box you want to grow mushrooms in. Depends on how many bags of grain spawn you’ve got, so it’s up to you. Some people online like to cut holes in their boxes, put boxes in boxes, whatever, each to their own, but it’s all just such a lot of effort, fuck that. I use a box that I don’t fuck with, no holes, no nothing. Zero effort all the way. Yield is going to vary based on your spores, your technique, your luck, but even a small box can get you a couple of ounces over a few flushes.
Coco coir! This stuff is ace. It’s got virtually no nutrients in, meaning that there’s no extra free food for competing contaminants. It’s just a way of giving the mycelium a greater surface area, and it holds water well, thus giving your mushrooms the liquid they’ll need to grow (Psilocybe Cubensis mushrooms are around 90% water). Some people add extra nutrients to their coir, but this does increase your risk of contamination so I don’t bother – the mycelium has plenty of food from all the rice. I hear a bit of gypsum is popular but again, I never bothered.
Now you’ve gotta work out how much coir you are going to add to your grain. For the sake of brevity, you can use anywhere from a 1:1 ratio, up to fucking loads:1. The more coir you use, the longer it will take to start fruiting, but the more surface area and water-holding material you will be adding (this is very important) so there is a balance to be struck. I really like 2:1 coir:grain, so let’s start with that. Feel free to fuck with this once you’ve done a few grows and got a feel for it.
To get coir to the right level of hydration for mushroom growing, you will need 200ml of water per 50g of coir. This will weigh 250g, so you will need to scale this up (for example, if you for for a 2:1 mix of coir to grain with a 1kg bag you will need 1.6l of water, and 400g of dry coir). You can squeeze it afterwards to see if it’s “field capacity” but trust me, it’s just right, especially once you spray the tub after this step is complete. Tried and tested, motherlickers.

How to prepare your coco coir properly:
1) First! Boil your kettle. Tip this water into your cooler to preheat it. This will stop you losing so much heat initially.
2) Now weigh out your dry coir. Break this coir up as much as you can with your hands.
3) Tip the water in your cooler out.
4) Throw the dry coir into the cooler.
5) Reboil your kettle, measure out and pour the correct amount of boiling water over your coir.
6) Mix really well. I use one of those pointy spaghetti ladle things, you can use whatever you like, I don’t care.
7) Put lid on cooler, allow it to cool as slowly as possible, this will take hours and hours.
What’s this all about? This is pasteurisation! This stage will help to kill off as many of the possible contaminants in the coir as you can. Leaving it as hot as possible for as long as possible is what we’re aiming for. It won’t kill off 100% of any contaminants in the coir as it’s just pasteurisation as opposed to sterilisation, but it is the difference between your tub full of mushrooms succumbing to contamination after the first flush vs succumbing after the fifth flush. Again, in terms of effort to results this is a worthwhile step. You’ll notice a theme here: Minimum buck, maximum bang (yeah boyee).
Get your tub, give it a clean with your disinfectant spray and alcohol wipes, let it dry, do not rush. Open your bag of grain and break the mycelium up into small chunks, as small as you can. I do this into a separate bowl first.
If there is green mould in your bag throw the bag away like I said in the last part of the guide, it will fuck up your whole tub if you use it – you will not win against green mould.
You can skip all of this if you’d rather spend money – Mycopunks sell hydrated, sterile Coir with Vermiculite and Gypsum already mixed in (commonly referred to as CVG). Up to you! I never bothered with adding Vermiculite or Gypsum because "zero effort" but if you're paying money you might as well have the extra bits in there I suppose.
Now put your grain and coir into the tub (save about 15% of the coir), and mix it really well. It’s that simple. Some people use a liner (bin bag or whatever) to try to stop mushrooms growing on the sides or bottom. I don’t do this, instead I really heavily tamp the sides down with my fingertips, so it’s full on compressed. This is to make it a less-desirable place to grow than the top surface. Mushrooms grow on the sides of your tub (commonly referred to as side-pins) because there’s a better pinning environment there, it’s got nothing to do with light (a really common misconception). You don’t need to paint your tub black or use a liner.
Once you have all your coir and grain in, make the top level, give it a very gentle press, then add the 15% of the coir that you had saved as a casing layer. Now spray a lot of water on the top surface. Like, go fucking mad for about 30 seconds, you should be able to see drops of moisture hanging around on the top.
Now I put bubblewrap on the top, leaving a 1cm gap around all the sides. I spray the underside of the bubblewrap first with 70% alcohol, which I leave to evaporate so it's nice and clean. The bubblewrap basically traps moisture in a constant cycle of evaporation and reabsorption, and is supposed to replicate the perfect fruiting conditions in nature (rain then sun). Much like everything else that I like to do in mycology, it’s zero-effort and increases yields, so do it. If you take anything at all away from these guides, it should be “use bubblewrap”.
Next, put a lid on your tub, and put it somewhere (NOT at ground level, gravity makes dust go there and dust has spores in) where it can get a little bit of light. They like some light just to tell them to grow upwards but they don’t photosynthesize so it’s not a growth requirement. If you can only do it in a dark cupboard don’t sweat it, it’s not a problem.
This stage is now another “leave it the fuck alone” stage. Through the side of the tub you should be able to see the mycelium reaching out to re-link with itself by around day two. You should leave this tub untouched for around a week. Resist the temptation to open the lid and peek. The amount of moisture we’ve put in with the coir and the initial spray is totally sufficient so it won’t need messing with, and the mycelium is happy with Carbon Dioxide as it keeps colonising. If you open it up it changes this balance, not loads, but there’s no need to do it. Leave it the fuck alone.

After a week, have a (quick) look if you must. The top surface should be almost all white with mycelium. You might even be able to see tiny bits of growth beginning. Now you can just flip the lid upside down in order to give a little bit of air. If it isn’t mostly white, leave the tub closed for another few days then check again.
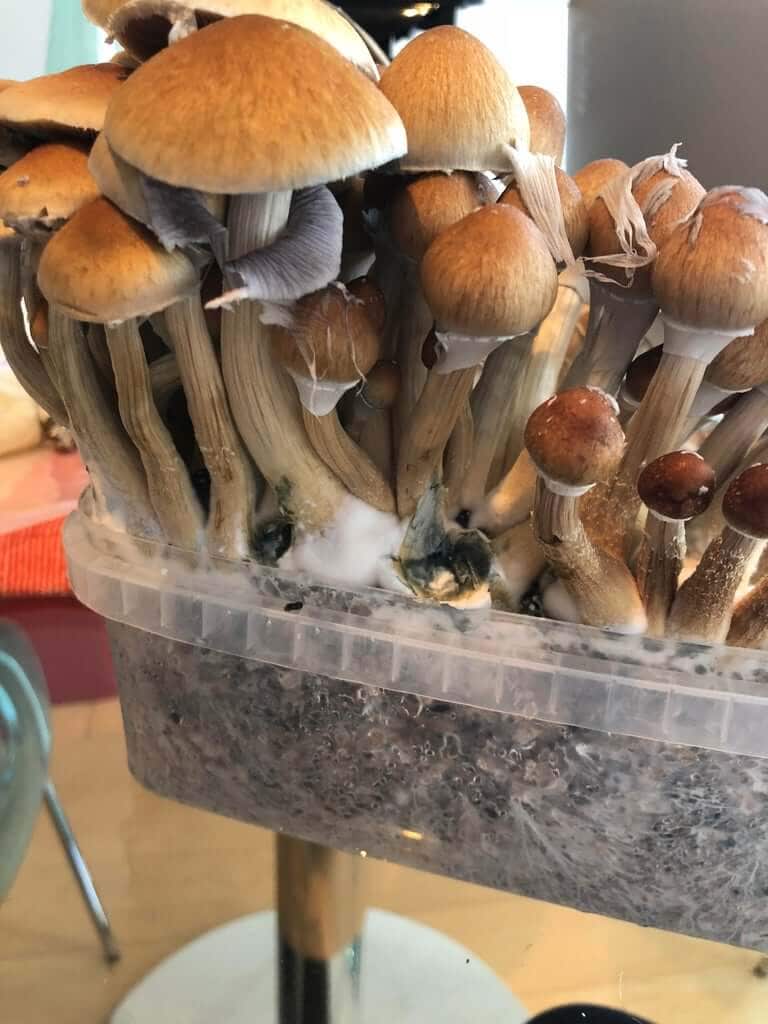
From this point it should take a week to ten days to get a harvest of mushrooms. They look like they’re growing slowly at first then they’ll grow like crazy, they can basically double in size over the course of 24 hours. You might notice your mushrooms getting something called “fuzzy feet” – you’ll know it when you see it. This just means they need some more air, so crack the lid of your tub a centimetre and leave it like that. This is just the mycelium trying to find oxygen, and it means it’s spending resources that you’d rather have in your mushrooms, it’s not harmful but it is a waste. Some people like to fan their tubs to increase the oxygen/reduce carbon dioxide but I can’t be arsed so I don’t.
Peak time to harvest in terms of potency is apparently just before their veil breaks and they start dropping spores, but don’t sweat this too much, it makes very little difference other than aesthetically (single digit potency loss allegedly). For example, better to wait a few days to let the mushrooms that were growing slower catch up, with some dropping spores, than have to harvest twice.
So that’s pretty much that bit. Next comes the fun bit: picking your mushrooms! Part four: Harvesting!